Brewing kombucha at home — the complete beginner's guide to first fermentation
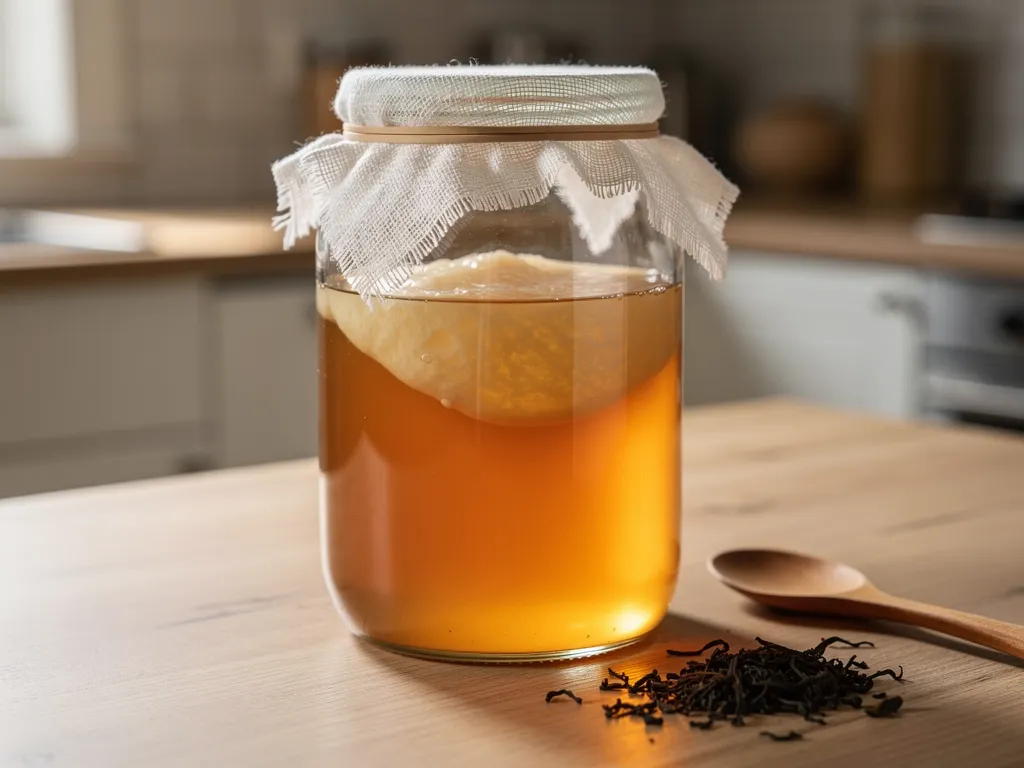
Exact ratios, temperature, timing — and what’s missing from most recipes: how to make your kombucha not just tasty, but provably safe too.
The short version, if you just want the recipe: per liter of water, ~5–6 g of black or green tea, ~70 g of white granulated sugar, then once cooled, 10–20% starter liquid and a SCOBY. Cover with breathable cloth, keep at 22–28 °C, in a dark spot, for 7–14 days. It’s ready once it tastes pleasantly tangy. The key to safety: the liquid’s pH should drop below 4.2 within a few days — that’s what the acidic starter liquid is for.
This article doesn’t just tell you what to do — it tells you why, because in brewing kombucha, the “why” is the difference between a reliable, safe drink and a gamble. Most recipes are vague about sugar amounts, temperature, and acidification. Here you’ll get exact numbers and the food science behind them.
What’s actually happening? Fermentation in a minute
Kombucha’s basis is simple: sweet tea fermented by a living culture. That culture is the SCOBY (Symbiotic Culture Of Bacteria and Yeast). The yeasts first break sugar down into alcohol and carbon dioxide, then bacteria (mainly acetic acid bacteria) convert that alcohol into organic acids — mostly acetic acid and gluconic acid.
This acid production gives the drink two things: its characteristic tangy taste, and — more importantly — an acidic environment that protects it from harmful microorganisms. Half of this article is about that, because it’s what determines whether what you’re drinking is safe.
What’s described in this article is first fermentation (F1): turning sweet tea into a tangy kombucha base. Carbonating and flavoring is the job of second fermentation (F2) — that’s covered in a separate article.
What you’ll need — and why exactly that
Ingredients (per liter)
- Water — ~1 liter, chlorine-free (see below)
- Tea — ~5–6 g loose leaf, or ~2 tea bags; only real tea from the Camellia sinensis plant: black, green, white, or oolong
- White granulated sugar — ~60–80 g; this feeds the SCOBY, not you — it breaks down most of it
- Starter liquid — 100–200 ml, 10–20% of the final volume; this acidifies the liquid immediately — the key to safety
- SCOBY — 1, the living culture that does the work
The tea. Use real tea — black, green, white, or oolong. These contain the tannins and nitrogen sources the SCOBY needs for strong fermentation. Black tea is the classic, fuller-bodied choice; green gives a fresher, lighter result. Avoid herbal and fruit teas as a beginner — they don’t contain the right nutrients, and their essential oils (e.g. in mint, bergamot) can inhibit the culture. Flavored teas (e.g. Earl Grey) are also better avoided at the start.
The sugar. Use plain white granulated or beet sugar. This matters because yeast breaks it down most evenly. Avoid honey, cane sugar, agave, and fruit-juice-based sugars: their high fructose content slows and unevens fermentation, and honey can also introduce its own microorganisms. Sweeteners (stevia, erythritol) don’t work at all — the SCOBY can’t feed on them. Don’t worry about the sugar: most of it is broken down during fermentation, and a finished batch typically has only a few grams left per glass — if you’re curious about your specific batch, our sugar content estimator gives you a rough number based on added sugar and fermentation time.
The water. Chlorine in tap water harms the SCOBY. Use filtered water, or boil the water (which you’re doing for the tea anyway), or let tap water sit for a few hours so the chlorine evaporates.
The starter liquid. This is 1–2 dl of finished, mature, unflavored kombucha from a previous batch (or from whoever gave you the SCOBY). This is the most important, and most often underestimated, ingredient — it’s not optional. The acidic starter immediately brings the fresh sweet tea down to a pH of around 4.0–4.5, and that acidity is what prevents pathogens or mold from taking hold before the SCOBY gets going. More on this below, in the safety section.
Equipment
- A large glass vessel (a 3–5 liter jar) — never reactive metal (kombucha’s acids can leach the metal). Glass is safest. Also avoid decorative, glazed ceramic, since some glazes contain lead, which the acidic drink can leach out.
- A breathable cover — tightly woven kitchen cloth, cheesecloth, or a coffee filter, secured with a rubber band. This lets air through (needed for fermentation) while keeping out fruit flies and dust. Don’t seal it airtight during F1.
- A wooden or plastic utensil for stirring (instead of metal).
- A pH test strip or digital pH meter — not required, but strongly recommended for beginners. It’s the only objective way to know whether your drink is safe.
The ratios — the most important part
The single most important factor in brewing kombucha is measuring the ratios correctly. The literature and practical guides agree on the ranges below. If you’d rather not do the math, our ratio calculator gives you the exact tea, sugar, and starter amounts instantly, based on your jar size.
Sugar: traditional kombucha is typically made within the 50–150 g sugar / liter range. In practice, 60–80 g/liter is the reliable middle ground: enough food for the culture, without being too sweet or too strong. Don’t go below 50 g/liter — that starves the culture and weakens fermentation.
Tea: roughly 5–6 g loose tea / liter, or ~2 bags / liter. More tea gives a fuller-bodied, more tannic result.
Starter liquid: 10% of the final volume is the minimum, 20% is the safe recommendation — especially in warm conditions, where the liquid needs to acidify quickly.
A scalable base recipe, for about a 2-liter batch:
- 2 liters water
- ~120 g white granulated sugar
- ~10–12 g loose tea (or 4 bags)
- 200–400 ml starter liquid
- 1 SCOBY
Practical tip: don’t fill the jar all the way — leave a few centimeters of air at the top, since the SCOBY needs an airy surface to work on.
Step by step
- Brew the tea. Boil about 1 liter of water (if making a 2-liter batch), and steep the tea in it for 5–10 minutes. The hot water also disinfects the liquid — killing off unwanted microorganisms.
- Dissolve the sugar. Remove the tea (or strain it out), and stir the measured sugar into the still-hot tea until fully dissolved.
- Cool it down — this is critical. Top up with the remaining cold (chlorine-free) water, and let the mixture cool completely to room temperature (20–26 °C). Hot or lukewarm tea kills the SCOBY. Don’t rush it — better to wait longer than to add the culture while it’s still warm.
- Pour into the jar, add the starter. Pour the cooled sweet tea into the clean glass vessel, then stir in the starter liquid. This immediately acidifies the liquid — the heart of this safety step.
- Add the SCOBY. With clean hands, gently place it on the surface. It doesn’t matter if it sinks or flips over — a new layer will grow on the surface regardless.
- Cover and let it rest. Stretch the breathable cover over the top, secure with a rubber band. Place it somewhere dark, away from direct sunlight and drafts, at 22–28 °C. Don’t move, shake, or stir it.
- Wait 7–14 days. Starting around day 5–7, taste it daily (using a clean straw or spoon near the edge of the SCOBY). It’s ready once it’s pleasantly tangy and no longer too sweet.
- Bottle it, or start a new batch. Once it reaches the taste you like, remove the SCOBY with clean hands, set aside about 2 dl of kombucha as starter for your next batch, and strain the rest into bottles. From here you can refrigerate it, or move on to second fermentation.
What’s happening under the hood? The science, briefly
In the first few days, yeasts dominate: they break sucrose down into glucose and fructose, then ferment these into alcohol and carbon dioxide. As alcohol forms, acetic acid bacteria also kick in, oxidizing that alcohol into organic acids — mainly acetic acid and gluconic acid. This acid production gradually lowers the pH, and that’s what gives kombucha its characteristic tangy taste.
Meanwhile, a new, smooth layer starts growing on the surface — this is the new SCOBY layer (pellicle), the cellulose that the bacteria produce. This is completely normal, and not mold (see below for how to tell the two apart).
Temperature strongly affects the process: around 25 °C gives you the best-quality kombucha in terms of physicochemical and microbiological composition. In cold conditions, fermentation slows down — and more dangerously, it acidifies more slowly, which increases the risk of mold.
Safety — the part most recipes skip
The vast majority of home-brewed kombucha is safe, but only if acidification happens in time. Food safety authorities are clear on this, and it’s worth understanding the logic.
The “danger window” and the pH 4.2 threshold
Fresh sweet tea has a pH of about 5 — a potentially hazardous range from a food safety standpoint, since pathogens can multiply at that acidity. During fermentation, the pH drops over a few days. According to professional guidance based on the FDA Food Code, the safe threshold is pH ≤ 4.2 — below that, acidity reliably inhibits pathogen growth.
This is why the starter liquid is so important: it immediately brings the pH close to 4.0–4.5, shortening the window during which the liquid is vulnerable. If there isn’t enough starter, the neutral sweet tea stays unprotected for too long.
Practical rule: if you have a pH meter, check it. If the pH hasn’t dropped below 4.2 after 7 days, professional guidance suggests the batch is likely contaminated or was kept somewhere too cold — in that case, discard it and start fresh with a new culture. On the other end: finished kombucha shouldn’t go below pH 2.5 either — that’s too acidic to drink.
You can manage fine without a pH meter if you follow the three basic rules: enough starter, clean equipment, 22–28 °C. But as a beginner, a cheap pack of pH strips is the best investment for your peace of mind.
Mold or a new SCOBY layer?
This is the most common source of beginner panic, in short:
- A new SCOBY layer (normal): smooth, wet, floating on the surface of the liquid, whitish/translucent/beige, possibly with brownish spots.
- Mold (throw it out): dry, fuzzy, fluffy patches — typically blue, green, or black — sitting on the surface, like bread mold.
If you see mold, throw out the whole batch and the SCOBY too — don’t try to wash it off or salvage it. For the definitive signs and the most common mix-ups, see our article Is your SCOBY moldy?.
Who should be cautious?
Kombucha naturally contains a small amount of alcohol (typically 0.5–2%, more on that here) and acids, and is an unpasteurized live drink. That’s why official guidance recommends caution or avoidance for pregnant and breastfeeding women, young children, and people with weakened immune systems. This isn’t medical advice — if you’re unsure, ask your doctor.
Quick troubleshooting
- Doesn’t start, very slow: too cold, or too little starter → move to a warmer spot (24–26 °C), use more starter next time.
- Too sour, vinegary: fermented too long → ferment for a shorter time; overripe liquid still works fine as vinegar.
- Still too sweet after 10 days: cold, weak culture, too little starter → warmer spot, longer time; don’t reduce the sugar.
- Dry, fuzzy, colored patch on the surface: mold → throw out everything, start fresh.
- Brown strands hanging off the SCOBY: yeast colonies → normal, no action needed.
- No carbonation: F1 isn’t supposed to be bubbly → bubbles form during the F2 (bottled) phase.
What’s next?
Once you have your tangy kombucha base, you have two paths:
- Drink it as is — strain it, refrigerate, and enjoy cold.
- Second fermentation (F2) — bottle it with fruit or fruit juice, sealed airtight for 1–4 days at room temperature: this is how it becomes bubbly and flavored. Our F2 carbonation step by step guide covers this.
And don’t forget: at the end of every batch, set aside some starter liquid, and your SCOBY can be reused again and again. You get it once — after that, all you need is tea, sugar, and patience.
Frequently asked questions
Do I need a pH meter? Not required, but strongly recommended for beginners. Without one, the three basic rules (enough starter, cleanliness, 22–28 °C) give you safety; with one, you can see objectively whether the liquid has acidified below 4.2.
How long does finished kombucha keep? Weeks in the fridge — cold slows fermentation. At room temperature it keeps acidifying, eventually turning vinegary (not dangerous, just unpleasant to drink).
Can I use tea bags? Yes, just make sure it’s real tea (black/green/white/oolong), unflavored. About 2 bags/liter.
Why not a metal vessel? Kombucha’s acids can leach reactive metals. Glass is safest; stainless steel is fine for brief contact, but not for storage.
Is kombucha alcoholic? To a small degree, yes — typically 0.5–2% in home-brewed versions, detailed here. That’s why it’s not recommended for pregnant women and children.
Sources
- NCBI PMC — kombucha fermentation review: traditional kombucha is typically made with 50–150 g/liter sugar (ncbi.nlm.nih.gov/pmc/articles/PMC12469587)
- Villarreal-Soto et al. (2018): Understanding Kombucha Tea Fermentation: A Review, Journal of Food Science — the role of yeasts and acetic acid bacteria in fermentation
- Fermentaholics — Kombucha ratios (tea, sugar, water, starter): real Camellia sinensis teas provide the SCOBY’s nutrients
- Revolution Fermentation — Best Sugar for Kombucha: minimum 50 g/liter sugar; fructose-rich sugars give uneven fermentation
- Complete Calculators — Kombucha Recipe Ratio: starter immediately brings the liquid to ~4.0–4.5 pH; min. 10%, 20% recommended in warm conditions
- Cardoso et al. (2020); Neffe-Skocińska et al. (2017): the best-quality kombucha is around 25 °C
- BC Centre for Disease Control — Food Safety Assessment of Kombucha Tea Recipe: the period before reaching pH ≤ 4.2 is the risky one; home molds are typically Penicillium or Aspergillus
- FDA Model Food Code–based kombucha guidance: the pH safety threshold is 4.2; if not reached within 7 days, discard
- Pennsylvania Department of Agriculture — Kombucha Brewing and Bottling Guidelines: pH monitoring with a calibrated meter, 4.2 threshold
- Colorado State University, Kendall Reagan Nutrition Center — The Do’s and Don’ts of Kombucha: finished kombucha’s pH is between 2.5 and 4.2; caution recommended for pregnant women, children, and the immunocompromised
This article is for informational purposes and does not replace medical advice. If you have a health condition, or are pregnant or breastfeeding, consult your doctor before drinking kombucha.