Second fermentation (F2): how to make your kombucha bubbly and flavored — safely
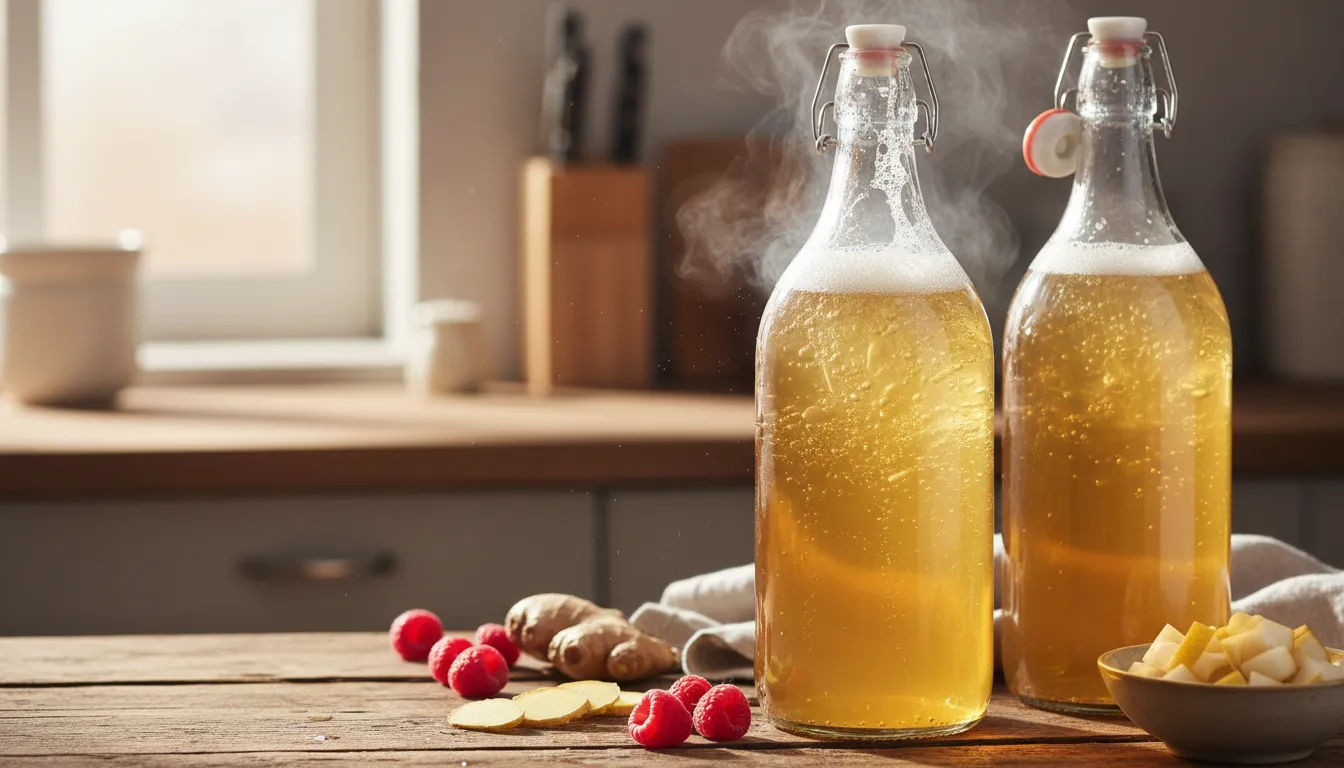
Fruit, ginger, carbonation — and the part most recipes leave out: how to avoid bottle bombs, which can cause serious injury.
The short version, if you just want the recipe: remove the SCOBY, add a bit of fruit or fruit juice to a pressure-safe flip-top bottle (about 1–2 tablespoons of puree or 2–4 cl of juice per half liter), top up with finished F1 kombucha, leave 2–5 cm of headspace at the top, and seal airtight. Keep at room temperature (20–26 °C), in a dark spot, for 2–5 days. “Burp” it daily (open briefly to check pressure), then once bubbly enough, refrigerate. Open carefully from the fridge, pointed away from you — an over-carbonated bottle can be dangerous.
At the end of primary fermentation (F1) you have a tangy, but flat and unflavored, kombucha base. Second fermentation — F2 for short — is the step where that base becomes bubbly and flavorful. This is the most fun part of making kombucha, but it’s also the only step with a real physical risk: pressure building up inside a sealed bottle. This article takes both seriously — the delicious result and the safety.
What happens during F2? The chemistry of carbonation
Carbonation — whether in soda, sparkling wine, or kombucha — is always the same gas: carbon dioxide (CO₂) dissolved in a liquid. In kombucha, that CO₂ is a natural byproduct of yeast: when yeast consumes sugar, it produces carbon dioxide alongside alcohol.
The trick is the sealed environment. During F1, the top of the jar is covered with a breathable cloth, so the CO₂ that forms escapes freely — which is why the kombucha base is flat. In F2, though, you pour the liquid into a sealed bottle and add a small new sugar source (fruit or juice). The yeast keeps fermenting it, but now the CO₂ has nowhere to go: pressure builds, and the gas dissolves into the liquid — that’s what gives you bubbles.
This is the key relationship worth remembering:
Sugar + yeast + warmth + sealed bottle = carbonation and pressure.
Carbonation and pressure are inseparable. That’s the good news (bubbles) and the risk (over-pressurization) at the same time — the same process creates both. The whole point of F2 technique is getting the bubbles while keeping the pressure under control.
What you’ll need
The bottle — this is where safety starts
This is your most important decision for F2, and it’s not one to skimp on:
- Flip-top (swing-top) bottles — the gold standard. Made from thick, pressure-rated glass, specifically designed for carbonated drinks, with a flip-top lid that’s easy to open and close for burping.
- Thick-walled, crown-capped beer bottles also work well, if sturdy.
What you should NEVER use for F2:
- Mason jars with a plain lid
- Wine or champagne bottles
- Decorative, angular, or thin-walled bottles
- Reused soda or juice bottles
These weren’t built for sustained pressure, and can shatter without warning. This isn’t a theoretical risk: in one documented case, a flip-top “growler” exploded and caused a deep, face-slashing injury requiring an ambulance and hospital treatment. The right bottle isn’t a luxury — it’s basic safety.
The flavoring
This can be anything that adds sugar or aroma: fresh or frozen fruit, 100% fruit juice, ginger, spices, herbs. Sugar content is key: the sweeter it is, the faster and stronger the carbonation (and pressure) will build.
- Strong carbonation producers: ginger (which specifically “feeds” the yeast), mango, pineapple, grapes, cherry/sour cherry juice — a little of these goes a long way.
- More gentle aromas: fresh herbs (mint, basil, lavender) add little sugar on their own, so carbonation will be milder too. If you want bubbles as well, add a bit of fruit juice or half a teaspoon of sugar alongside them.
Avoid juices with preservatives (potassium sorbate, sodium benzoate) — these inhibit fermentation and kill carbonation.
Flavoring ratios
The goal is to have enough sugar for carbonation, but not so much that pressure becomes dangerous. The proven practical ranges, roughly per half-liter bottle:
- Fruit puree — ~1–2 tablespoons / half liter
- Fruit juice (100%) — ~2–4 cl (2–4 tablespoons) / half liter
- Fresh grated ginger — ~1 tablespoon / half liter
- Whole/chopped fruit — a few slices or ~2–3 tablespoons / half liter
- Herbs/spices only — supplemented with half a teaspoon of sugar for bubbles
Basic principles:
- Start at the low end of the range. More fruit doesn’t necessarily mean better flavor, but it definitely means more pressure. You can adjust upward on your next batch.
- Leave headspace: fill up to the neck of the bottle, but leave 2–5 cm of air at the top. This space is needed for CO₂ to build up; too little headspace increases pressure risk.
- Chop the fruit: smaller pieces release sugar and aroma faster.
Step by step
- Check that F1 is ready. The base is ready for F2 when it’s evenly tangy — no longer too sweet, but not straight vinegar either. A base that’s too sweet, plus the added sugar in the bottle, is the most common cause of over-carbonation.
- Remove the SCOBY and set aside starter. With clean hands, lift out the culture, and set aside about 2 dl of kombucha as the starter for your next batch.
- Strain (optional). If yeast sediment bothers you, strain the liquid — but a little yeast helps carbonation, so don’t over-filter it.
- Add the flavoring first, into the empty bottle. Put the flavoring in the bottle before pouring in the kombucha — this mixes more evenly and gives more consistent results across bottles.
- Fill up, leave headspace. Fill to the neck, with 2–5 cm of headspace. Seal airtight.
- Ferment at room temperature, in the dark. Keep it at 20–26 °C, away from direct sunlight, for 2–5 days. Warmer is faster, colder is slower — it can take longer in winter than in summer. If you want to know roughly how long you’ll need at your specific temperature, our carbonation time estimator will estimate it for you.
- Burp daily. Once a day, open the top briefly (barely lift the flip-top clasp) to release excess pressure and check how bubbly it’s getting. If it hisses and fizzes, it’s progressing.
- Refrigerate once ready. Once it reaches the carbonation you want, put the bottles in the fridge. Cold drastically slows the yeast, essentially stopping further carbonation, and stabilizes the CO₂ in the liquid.
- Open carefully, while cold. Always open a fridge-cold bottle (cold keeps the CO₂ in the liquid, reducing foaming), slowly, pointed away from your face, over a sink or bowl. If you used whole fruit, strain when serving.
Safety: the bottle bomb — and how to avoid it
A kombucha bottle bomb is preventable, but real. If ignored, the best case is a sticky geyser and a mess; the worst case is flying glass shards and injury. Let’s look at what causes it and what to do.
What causes over-pressurization?
The three most common mistakes:
- Too much sugar — a base that’s too sweet at bottling time, or too much fruit/juice in the bottle.
- Too warm / too long an F2 — heat speeds up the yeast, and a long duration keeps building pressure continuously.
- The wrong bottle or too little headspace — thin or decorative glass, or barely any air space left.
The seven preventive steps
- Use pressure-rated flip-top or thick-walled bottles — never decorative, thin, or unsuitable bottles.
- Don’t rush F1 — start with an evenly tangy base, not one that’s too sweet.
- Dose sugar/fruit carefully — better to use less, then adjust up next time.
- Leave 2–5 cm of headspace in every bottle.
- Don’t keep it in a hot spot — avoid direct sun, near an oven.
- Burp daily, especially in warm conditions — if a bottle is rock-hard or hissing and bulging, act.
- Once ready, refrigerate — cold stops pressure buildup.
Extra safety measures
- Test-bottle method: with a new flavor, fill one bottle as a “test.” If it pressurizes quickly, refrigerate the rest sooner too — this can save an entire batch.
- Store in a container: during F2, keep the bottles in a box, crate, or cabinet, so a potential accident doesn’t spray everywhere.
- A suspiciously rock-hard bottle? Don’t shake it. Chill it for several hours to reduce pressure, then open carefully, wearing eye protection, over a bowl — or place it in a bag/box and discard it. Half a liter of kombucha isn’t worth risking your eyes.
Important distinction: by the time you’re at F2, there’s no longer a mold risk the way there is during F1 — the well-acidified base protects the drink. Here the risk is purely physical (pressure), not microbiological. So cleanliness isn’t the main safety factor here — pressure management is.
Proven flavor combinations (for half-liter bottles)
These are reliable, beginner-friendly ratios. Seasonal fruits are highlighted separately — worth experimenting with when they’re actually in season.
- Ginger-lemon (classic) — 1 tablespoon grated ginger + juice of half a lemon, 3–4 days F2. Popular for a reason: ginger builds strong carbonation.
- Mixed berries — a handful of raspberries, blueberries, and blackberries, slightly crushed, 2–3 days F2. Deep purple color; strain when serving.
- Apple-cinnamon — 4–5 thin apple slices and half a cinnamon stick, 3–4 days F2. Best with a tart apple variety; a “sparkling cider” effect.
- Elderflower — 2–3 elderflower clusters or 2 cl elderflower syrup, 2–3 days F2. A spring, seasonal favorite.
- Sour cherry — a few pitted, halved sour cherries or 3 cl sour cherry juice, 2–3 days F2. A summer seasonal option; high sugar content means strong carbonation — dose carefully.
- Raspberry-basil — 4–5 raspberries and 2–3 basil leaves, 2–3 days F2. Summery; basil adds a subtle, herbal layer.
- Mango (extra bubbly) — 2–3 cubes of fresh mango, 2–3 days F2. Carbonates very fast — check it early.
Practical tip: ginger and high-sugar fruits (mango, grapes, sour cherry) carbonate aggressively — start with less of these, and check the bottles starting from day 2.
Quick troubleshooting
- Stays flat, no bubbles: too little sugar, the bottle isn’t sealing, too cold, or the liquid was over-strained → add half a teaspoon of sugar or a bit of juice, check the seal, keep at 22–25 °C.
- Over-carbonated, geysers when opened: too much sugar, or F2 was too warm/long → next time use less flavoring, refrigerate earlier, always open cold.
- Rock-hard bottle, hissing/bulging: over-pressurized, bomb risk → chill it carefully, then open over a bowl, protected; review your dosing next time.
- A thin film forms on the surface: a new mini-SCOBY → normal occurrence, strain when serving.
- Sediment at the bottom of the bottle: yeast and fiber → normal, harmless; if it bothers you, decant or strain.
- The taste turns bitter after a few days: the herb or fruit stayed in too long → shorten F2, strain out solids before refrigerating.
Frequently asked questions
How long does F2 take? Typically 2–5 days, but depending on temperature and flavoring it can be 1–7 days. Faster when warmer.
Can I skip F2? Yes — if you don’t need bubbles, you can strain and chill the F1 base and drink it as is. Without F2, though, it stays flat and unflavored.
Do I have to burp it? If you don’t have a pressure gauge, essentially yes — it’s the simple way to check pressure and avoid a bomb. In exchange, a little carbonation escapes.
Why open it cold? Cold keeps the CO₂ in the liquid, so it foams less, reducing the risk of a geyser or accident.
I want more carbonation — what should I do? A bit more sugary flavoring, a warmer spot, or a longer but still safe F2. Ginger is a particular carbonation booster.
Can mold still happen during F2? Practically no — the well-acidified base protects against it. The risk during F2 is pressure, not infection.
Sources
- Homestead and Chill — Kombucha Carbonation Tips: carbonation comes from dissolved CO₂, a byproduct of yeast fermentation.
- Fermentaholics — How to Bottle Your Kombucha: during F1, CO₂ escapes from the open vessel, which is why the base is flat.
- Fermentaholics — Second Fermentation Guide: in a sealed bottle, CO₂ dissolves into the liquid and forms carbonation; sugar feeds the yeast.
- The Good Bug — Second Fermentation and Flavouring: pressure-rated flip-top bottles recommended; decorative, thin-walled bottles should be avoided.
- Old School Ferments — How To Flavor Kombucha: decorative bottles, mason jars, and wine bottles aren’t suitable for F2; herb-based flavors need a little sugar for bubbles.
- FermentWorks — Fermentation, over-carbonation, and explosions are real: a documented flip-top bottle explosion causing a serious facial injury; how to handle a suspicious bottle.
- Complete Calculators and Kombucha Kamp — high-sugar fruits and ginger carbonate more strongly; ginger “feeds” the yeast.
- Old School Ferments; Fermented Fizz — mango, pineapple, grapes, and sweet cherries carbonate aggressively; start with less flavoring; avoid juices with preservatives.
- Craft a Brew — Kombucha Bottle Bombs; The Good Bug: leave about 2.5–5 cm of headspace; too little headspace increases pressure risk.
- Craft a Brew; Ferment Guide — the main causes of over-carbonation: a base that’s too sweet, too much sugar, warm and long F2.
- You Brew Kombucha; Fermented Fizz — add flavoring first into the empty bottle, then the kombucha; test-bottle method for a new flavor.
- Homestead and Chill — no mold risk during F2 thanks to the acidic base; carbonation builds slower when cold, faster when warm.
- Kombucha.com — Secondary Fermentation (F2): burping is how you check pressure and prevent explosions.
- The Good Bug; Homestead and Chill — refrigeration drastically slows fermentation and stops further carbonation buildup.
- Kombucha.com; Ferment Guide — CO₂ solubility depends on temperature; open cold to avoid foaming and accidents.
- Kombucha Kamp — Bottling Without Explosions: avoid hot/sunny spots, check daily in warm conditions, store in a box to contain risk.
This article is for informational purposes. The pressure generated during second fermentation is a real physical risk — always use pressure-rated bottles and follow the safety steps. If you have a health condition, or are pregnant or breastfeeding, consult your doctor before drinking kombucha.